To paraphrase Vane Jones, "Knowledge is of little value until shared with others."

Saturday, February 24, 2018

Finishing-Up the Single Truck Work Car Part 2

After assembling my single truck work car I decided to place an operator of the car inside plus make a coupler adapter for Kadee couplers. For the interior of the work car a pattern for the floor at the end of the car had to be made.

I work with lined index cards mainly due to their availability, the lines help to keep the drawing square, and are thick enough to keep their shape. The card stock is easy to remove and place back into small spaces and retain its form.
Initial drawing for interior end of floor

Final drawing for interior end of floor after trying out for size.

Next the 2 styrene floors with vertical pieces to hold the controller and "wind-up" brake handle were make using the card stock floor piece as a pattern. The floor and vertical end pieces were make from 0.040" styrene. Little gussets were added to keep the end pieces square with the floor. The middle section was left out for the headlight and wiring.
The headlight housing and wires are visible in the center of the dash.


Two pieces of square styrene were added to the bottom of the floor to provide space for screws holding the coupler in place.

The next photo shows the Q-Car controller and brake used in the model. The 2 men in the Fun & Games containers show the figure I found to use as a motorman even though his hand is not in the correct location to operate the controller. The stock number is ORL-12.

You should be able to find Fun & Games Figures on the web. He has a large number of figures for sale. He is located near St. Louis, MO. Originally this figure was painted with dirty skin as though he was operating a steam locomotive. I contacted the owner of Fun & Games and was told I could request cleaner skin if I ordered a few of them at a time. So, I ordered 6. I've repeated my order many times.
Some of Fun & Games figures are soft metal while others are epoxy. This figure is soft metal and can be bent a little!

We will cover the strange thing attached to the coupler and the use of bath tube caulk as an adhesive in the next Post.

Cheers,
Ed

Saturday, February 17, 2018

Finishing-Up the Single Truck Work Car

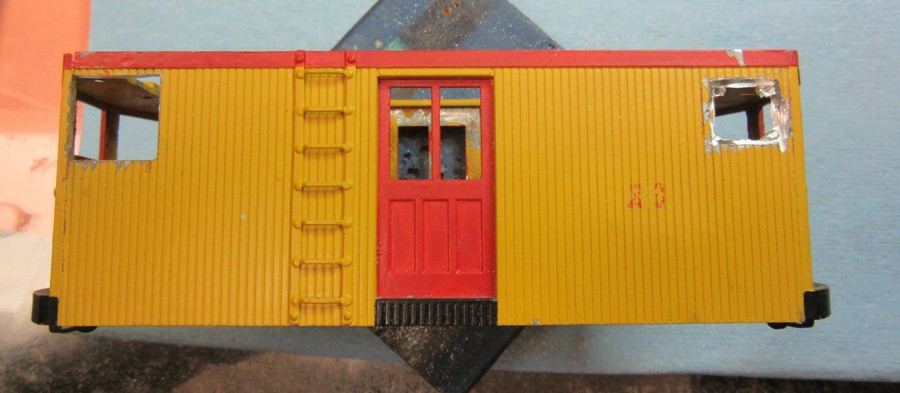
When choosing windows to be installed in the sides of the car, remember this car due to its use as a wrecker or repair car; would have bins for small parts and supplies, ropes, chains, etc. installed along the interior of the sides. The larger the windows installed in the sides, the less supplies and equipment can be stored in the car.

Before the glazing is glued in place. Other work on the model had to be done. This type of car can have couplers. Usually the type of coupler used was the Van Dorn coupler. The Van Dorn was a common link and pin coupler found on streetcar lines.

As part of the models and parts available when Pittman was making not only small electric motors but also models in which the electric motors could be used was a working Van Dorn coupler. In the 1950's Wagner had the same Van Dorn coupler in his catalogue. At that time I picked-up a couple of the coupler sets. They were installed in the brass open bench models I had finished. Then the couplers were no longer available.
Sometimes parts come broken or bent. If possible obtain more than you need. The coupler pockets cannot be repaired. The one coupler pocket with the broken loop for attachment to the coupler shank can still used. With the pin in place the pocket can be glued in place. 

At a trolley meet last fall a vendor had a few sets of the Van Dorn couplers I was able to obtain. This allowed me to add them to the model of the work car plus another model of the same era. The photos show the installation of the couplers on the model.

One comment on the installation: Since the point of installation would be where a large hole in in the underframe of the model, small pieces of brass were installed to the cast metal frame. This way the 0-80 screw used to mount the coupler shank be screwed into a material that will hold the threads. Styrene is used for spacers only where a strong metal is under the styrene to hold the threads.
The painted, not squarely installed cross-piece in the left is for mounting the power truck. The coupler carrier was glued in place. The coupler shank is mounted with screws. 

Next comes the decals. Microscale and Micromark have decal paper for computer printing of decals. Carefully follow the instructions of the manufacturer of the decal paper. With newer computers and printers a large number of fonts are available. The program "Word" will allow you to have a number of printing the letters.

The only limitation is that you will not be able to print in white or the metallic colors of gold, silver, etc. unless you have a special printer.

Once the information you are interested in having is printed on the decal paper, it needs a coating of a material to protect the printing procedure the installation of the decals. Microscale makes Micro Liquid Decal Film which can be painted on using a brush or sprayed. A very thin coat is required. If you have problems spraying the Decal Film, isopropyl alcohol can be added by the drop to thin the Film. Only a small amount (1-2 drops)of the alcohol is needed. A 91% solution of isopropyl alcohol is available in most pharmacies.
Microscale's Micro Sol was used to soften and set the decal film. Sometimes it takes multiple applications of the Sol to get the film to go into the lines between the boards. A new razor blade can be used to cut the decal film to get the film into the lines. 

The glazing for the windows made from 0.015" clear styrene. The clear styrene was cut and filed into the correct size. My favorite tool to file plastic is an emery board. Model window glue (A diluted clear water soluble caulking.) was used to keep the glazing in place.
The "EMERGENCY" lettering is a special feature of Word. Letters can be outlined in a different color. Outlining a letter in black gives the letter more character.

The headlight lighting is directional using diodes. An operator was installed after the photo was taken.

More C&U service cars in the next Post.

Cheers,
Ed

Thursday, February 15, 2018

OOP'S Better be Careful

After Posting the last I attempted to cut off my finger!!!!!

In cutting the glazing with a new single edge razor blade, my finger was in the way. Approximately a 1 cm round piece of skin etc. was cut off. 

Since it would not stop bleeding a trip to the emergency room was required.

Before the accident, I wasn't too sure I wanted to work on the glazing (0.020" clear styrene). The razor blade made up my mind for me!


Be careful it's a jungle out there!

Cheers,
Ed


Saturday, February 3, 2018

What Can Happen After a Positive Project Outcome?

Scratch building and completing the portable substation model turned out so well, it gave me the idea to bring the roster of my railway's service cars up-to-date with new paint schemes, parts, and more. The work included repainting, making decals, alterations. The non-powered cars were given odd numbers while the powered car was given an even number.

The service cars are:
  • An old Pittman single truck work car. CURX 00
  • An All-Nation C.E.R.A box car. CURX 03
  • An incomplete wooden sheath box car. CURX 05
  • A secondhand interurban flat car. CURX 07
  • An interurban flat car kit by Midwestern Hobby Models. CURX 09
Pittman Single Truck Work Car
Originally completed about 40 years ago, this work car had been painted yellow with red trim. The roof, underbody, and truck sideframe were painted a weathered black.

If you're familiar with the model, you know the motorman can only see forward and not to the sides. I've always wanted to add side windows just like the ones I had added to my Pittman box motor. .After looking into the use of the same windows, I found them to be too small for what I wanted. Instead a larger size Grandt Line window was chosen.

Adding the windows is easier than you think. Know where the sides have to be cut and work slowly. It's better to make the initial window cut-outs for a smaller window and work your way to a larger size. The photos will show the steps I took. The work took a little less than 30 minutes per window. Most of the time was spent filing the metal to the correct size.

I like the Grandt Line windows because they have a casing around the window as part of the plastic casting. The casing hides the edges of the hole filed into the metal side of the model. Although many windows in railroad cars did not have a casing around them, the windows added to the model with a casing do not stand out as being unusual.

The paint was not removed from the model. If this was a better, more important model the paint would have been removed. However, the model was lightly sanded to remove any loose paint, remove the decals, and smoothened the metal.

The 1st photo was taken with the model in its side. For the Blog the photo was rotated to the right. Also, notice the new window openings have been cut into the side. I had forgotten to take this photo before starting the work on the model.
 

This photo gives you an idea as to how the selected window looks compared to the end windows. The new windows will be shorter and wider. 


 The side of the model prior to starting any cutting


 Smaller than required holes have been cut. Lines had been drawn to show where to cut.


 A window has been placed next to the hole to show how small the hole is. The window needs to be turned to the correct orientation. Mill files were used to cut the hole to the correct size.


 The window in the enlarged hole. 

 One hole on this side done. The other has to be enlarged.


 Both holes are completed.


 The windows have been glued into place. Notice the mullions have been cut out and the window frame sanded. My windows will be 1 pane of glass. This will give the motorman an unobstructed view. 


When all the windows were installed, the model was spray painted with the same color as the portable substation. Above the model are cut-outs of potential words to be made into decals. They are being tried out for size and location.

More about finishing the model and making personalized decals in the next Post.

Cheers,
Ed